Showing posts with label GPS. Show all posts

Sunday, 10 May 2015

Uploading vector layers from QGIS and store in GPS receiver (USB Port) using DNR GPS


 YouTube Video Link


Overview
This post is what I would like to call the USB route to uploading GPX layers from QGIS into a USB Port GPS receiver.
Note-
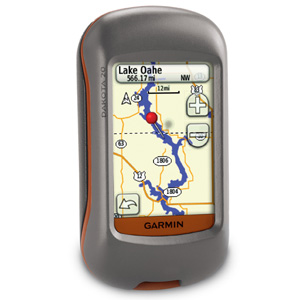
- The GPS receiver- Garmin Dakota series- comes with only USB Port. If your receiver comes with a serial com port, you can do the upload direct without going through DNR GPS.
- Apart from converting files, DNR GPS also serves as an upload vehicle for GPS receivers.
- The DNR GPS is not acting as a converter in this procedure but an upload vehicle.
- In QGIS, one can digitize layers on the image using GPX file format direct.

Task
We want to create and upload layers (point, line and polygon) from QGIS and store as waypoints, route and track in our GPS receivers. Steps to follow- (a) Trace out waypoint, route and track layers on the image in QGIS; b) Upload to the GPS receiver using DNR GPS.
Note- One can save it straight into the GPX folder in the drive of the receiver but this denies one the opportunity that DNRGPS offers, which is, viewing the contents of the GPX file before upload.

Procedure
1. Launch QGIS. Go to Layer>Create new layer>Create new GPX layer.
2

2. Digitize waypoint, route and track features (point, line and polygon) on the image. The waypoints are in red, the route in purple and the track in yellow. Make sure the layers are properly saved after digitizing.
12

3. Launch DNR GPS. Go to File>Load from>File. Navigate to the folder where the gpx file was saved. Open the gpx file from the working folder. A message box will show indicating the file has been successfully loaded.
pix 5

4. Click on Waypoints and the waypoints created in QGIS will appear. Take a good look at the Tracks(red boxed) and Route buttons(green boxed). Note that the tracks and routes that were created were also uploaded together with the waypoints. Click on them to check the contents.
15

5. Go to Track and click Upload. Do the same for route and Waypoint. A message box saying Upload Complete indicates the file has been uploaded to the GPS receiver.
Capture-2


6. Disconnect the GPS receiver and check for the uploaded waypoints, route and track.
TrackRouteWaypoints_001

Hope you are already practicing with the QGIS. Feel free to send your feedback and comments.

Tip- you can double click on the images and it will open in a new window in a larger size.

Friday, 8 May 2015

Adding scanned paper maps to the GPS receiver using Google Earth


Document1-001
This post will demonstrate how we can convert a scanned paper map into a format where we can upload it into our GPS receiver and use it as a base map. A good software for carrying out this process is Google Earth. Our GPS receiver for this demonstration is a Garmin Dakota.

Task
Using Google Earth to Add a scanned paper map for use on the GPS receiver.

Tips
- the paper image should be scanned at a dpi>109
- Better to use image format jpeg

Procedure

1. Launch Google Earth. Pan to the selected area where the scanned map is located. In our case, its south west of Ibadan city. Go to ADD >Image Overlay. Here navigate to where the image is and click OK in the dialog box and the image will come in.
1

2. In our case, we picked a geographic coordinates of a known location on the map. We put the coordinates in the search box (red boxed) and then adjusted the image to the right position on the map. To adjust the image, Right click on the file (yellow boxed)>properties.
2

3. A green border will appear to guide the adjustment.
4

4. In the properties box below, adjust the transparency to the middle between opaque and Clear; Go to the Altitude Tab and adjust as below. This settings will ensure that the image will overlay the map in the GPS receiver.
3

5. Right Click on the File > Save Place As5

6. Save File as type Kmz!!! Save in the CustomMaps folder in the GPS receiver. Create one if it didn't exist there.
6

7. Here is a screenshot in the GPS receiver map display.
7

Thursday, 7 May 2015

Tracing polygon features from a google satellite image and uploading them to GPS receiver using DNRGPS

 youtube video link

Overview
Our previous post dealt with a similar process but instead of polygons we were uploading routes. This post will demonstrate how polygon or area features can be digitally traced out on a google satellite image in google earth, saved as KML and then uploaded and stored as tracks in a GPS receiver.

Task
- Digitally trace out a polygon feature from a google satellite image in google earth and
Save the place as a Kml file format.
- Load it into DNR GPS and convert it to GPS Xchange file format(*gpx)
- Upload it as Tracks to the GPS receiver.

Procedure

1. Launch google earth and locate your polygon of interest. Pick the ADD POLYGON tool and digitally trace out the area. Give it a name in the dialog box and check that it is in the Places window (red boxed). Right Click on the polygon (area feature) >Save place as. The Save as dialog box will open; make sure it is save type as KML.
11

2. Launch DNR GPS and Go to File>Load From> Google Earth> My Places
13

3. An Open database dialog box will come up. Go down to Google Earth My places, click on it and click ADD (red boxed)
12

4. Fill the dialog box and OK to access the data in google earth my places and Press OK. A loaded data complete message will appear and the data will be loaded into DNR GPS.
14

5. Select name as the TRIDENT which simply means Type identify. Our Type identity is area feature
15

6. The kml file area feature will be loaded into DNR GPS
19

7. Go to File>Save to> File. In the Save as dialog box, save type as GPS Xchange Format
17
16

8. In this dialog window, Check Tracks as polygons are stored as Tracks in a GPS receiver. A message box will notify that the file has been successfully saved.
18

9. Connect the GPS receiver, Go to Tracks>Upload
Capture-2

10. Window will open to prompt you to name the uploaded data, click OK. A message box confirming Upload complete will pop up.
Capture-3

Check the GPX folder of the GPS receiver Drive in C. for the uploaded track.

Monday, 4 May 2015

Uploading data in excel spreadsheet into a GPS receiver

Document1-001

A lot of field work data is reported in the form of tables and spreadsheets. A field staff will normally document his or her field data in excel tables and then file them in with the report. Therefore, it is usually the first source to retrieve locational data from. We will be demonstrating this process using the DNR GPS software as an intermediary to do the conversion to GPX files as well as to upload the data into the GPS receiver.

Task
In this demonstration, we will do the following:
- Save Excel data in a format that DNR GPS will recognize- Text Tab delimited.
- Convert using DNR GPS to GPX format
- Upload to the GPS as Waypoints, routes or tracks.

Procedure
1. Launch microsoft Excel. Navigate to where the file is and Open in excel.
1

2. Save type as Text (Tab Delimited)*txt* in the Save as dialog box. Click yes for any prompts that pop up during the process.
2

3. Launch DNR GPS. File > Load From>File (red boxed). Navigate to the Text file just created.
3

4. Open it and it will load into DNR GPS.
4

5. File > Save To> File. In the Save as dialog box, this time for Save Type as - select from the dropdown list- GPS Xchange file *gpx*
5

6. Select Waypoints, tracks or routes as is appropriate. For this demo, waypoint is selected.
6

7. Connect the GPS receiver, go to Waypoints> Upload. It will prompt for the name, fill the name and OK. The Upload complete message box will show.
7

8. Disconnect the GPS receiver and check the GPX folder in the Garmin drive for the waypoints.

How to Check the Garmin GPS receiver for GPX files
Go to the Drive on your computer- Garmin Drive E
Open the drive and Click on the Garmin Folder
In the Garmin Folder, locate the GPX folder
Open the folder and look for the uploaded file.

Wednesday, 15 April 2015

Handheld GPS Receiver Units- an Essential tool for the Mapping enthusiast

Click link to see images of handheld GPS Units


Handheld Global Positioning System (GPS) receivers are GPS enabled devices that are portable and are adapted for mobile and outdoor activity such as hiking, biking and even some utility mapping. Suffice to say that even some professionals still find them handy and accurate to a specification. They come in many brand names, with many specifications but are generally classified by price into low, mid and top range models. They can also be classified by function into mapping grade, biking, hiking and marine.

These devices have seen a massive improvement in their design, hardware and software specifications. Many of the leading brands such as Magellan and Garmin have gone ahead to develop cloud based platforms as well as imagery download capabilities in their mid-priced ranges. In addition, the brands have led aggressive marketing to promote the appeal of these devices to the less professional and recreational users.

Mapping grade handheld GPS devices usually come with four standard functions namely-Waypoint, Route, Track and Navigation. These functions give the user the tools to represent real life features properly as well as find his or her way around. They come with a base map and enables the user to capture points, lines and calculate area features and view on a map. They store the data that is captured on the field, with some mid-priced ranges able to store 1000 units of data outside of the memory card. Basically the degree and sophistication of functions drive the price tag.

My favourite handheld tool for a while had been the Garmin GPSMAP 78s. It has a rugged feel and a good sized screen, but it is now way behind in the trend of things today. I got a Garmin Dakota 20 recently and it sports a larger screen,touchscreen and has an interface that is easier (at least by me) to input data. In everything, best of all is the price because for some of the power it packs, it comes at a low to mid-price range of between 180 to 220 dollars.

Nowadays, top range handheld GPS receivers are bundled with a variety of additional high tech software and hardware capabilities such as inbuilt cameras, health and ergonomic monitors, cloud based connections, internet sharing and so on. They could cost anything from 800 to 1500 dollars.

Handheld GPS devices are outdoor tools so they are made to be rugged, float on water and weather resistant. Some are equipped with marine charts and this is normally indicated in the marketing prose.

One of the great things about handheld GPS is the ability to download your data after working on a trip, hike or even serious professional activities.  Most of them come with downloading USB cables and proprietary interface software. We will choose a later post to talk more about downloading and uploading GPS data.

Hope you have gotten that bit of basic information on handheld GPS receiver units. Let us have your comments please

Next post, we debate the myths and facts behind the Handheld GPS receiver!!!